Passive amplification is amazing for what it can do to the audio from a tinny little speaker.
After learning the basics in OpenSCAD, having designed a Pegboard Rack, I thought I’d try something a little more complicated. I had previuosly tried, and failed, to create a passive amplifier in SketchUp. The idea was to have an organic, flowing horn that twisted itself around other horns. Getting something to move organically in SketchUp defeated me. I won’t go into boring detail, but the the problem I had in SketchUp doesn’t exist in OpenSCAD.
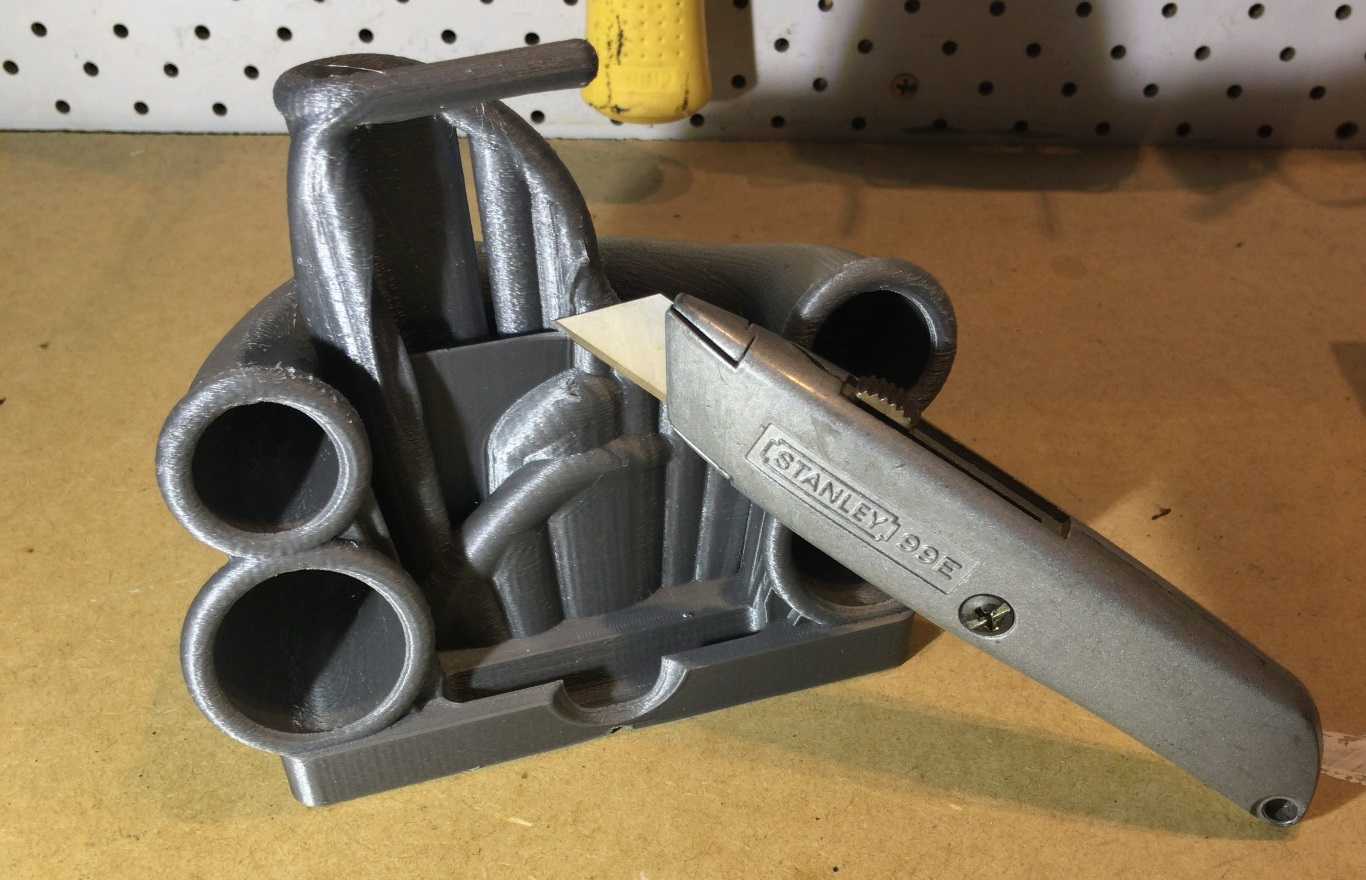
One of the improvements in the iPhone7 is that it adds a stereo speaker at the top of the phone face alongside the previous speaker on the bottom of the phone. Previously created mono-amplifiers would only amplify the one on the bottom. This passive amplifier has pickups in both locations to reproduce the stereo sound and double the amplification.
Also, most passive amplifiers are quite tinny in their amplification because they expand the cone very quickly. This amplifier is all about length, the pathway for each high band amplifier is 200mm long and expands 8x over this length. The mid and low-band frequencies are treated to a 400mm path expanding 5x over that path. The lower expansion over a longer distance helps the low band amplify better.
While not the same quality as a good Bluetooth speaker, it sure is a lot more fun to build!
If you’re interested in modifying this build, it was done completely in OpenSCAD. However, if you want to open this file, be warned it takes a long time compile. The final render of this model took an hour and a half on my system. To speed up any design changes, open the file and scroll towards the bottom, there are 5 lines that are indicated “remove for F5 support”, comment these lines out and the model will render without the interior cones and without the automatically generated support structures. Add these line back in and press F6 to wait for an hours long render.
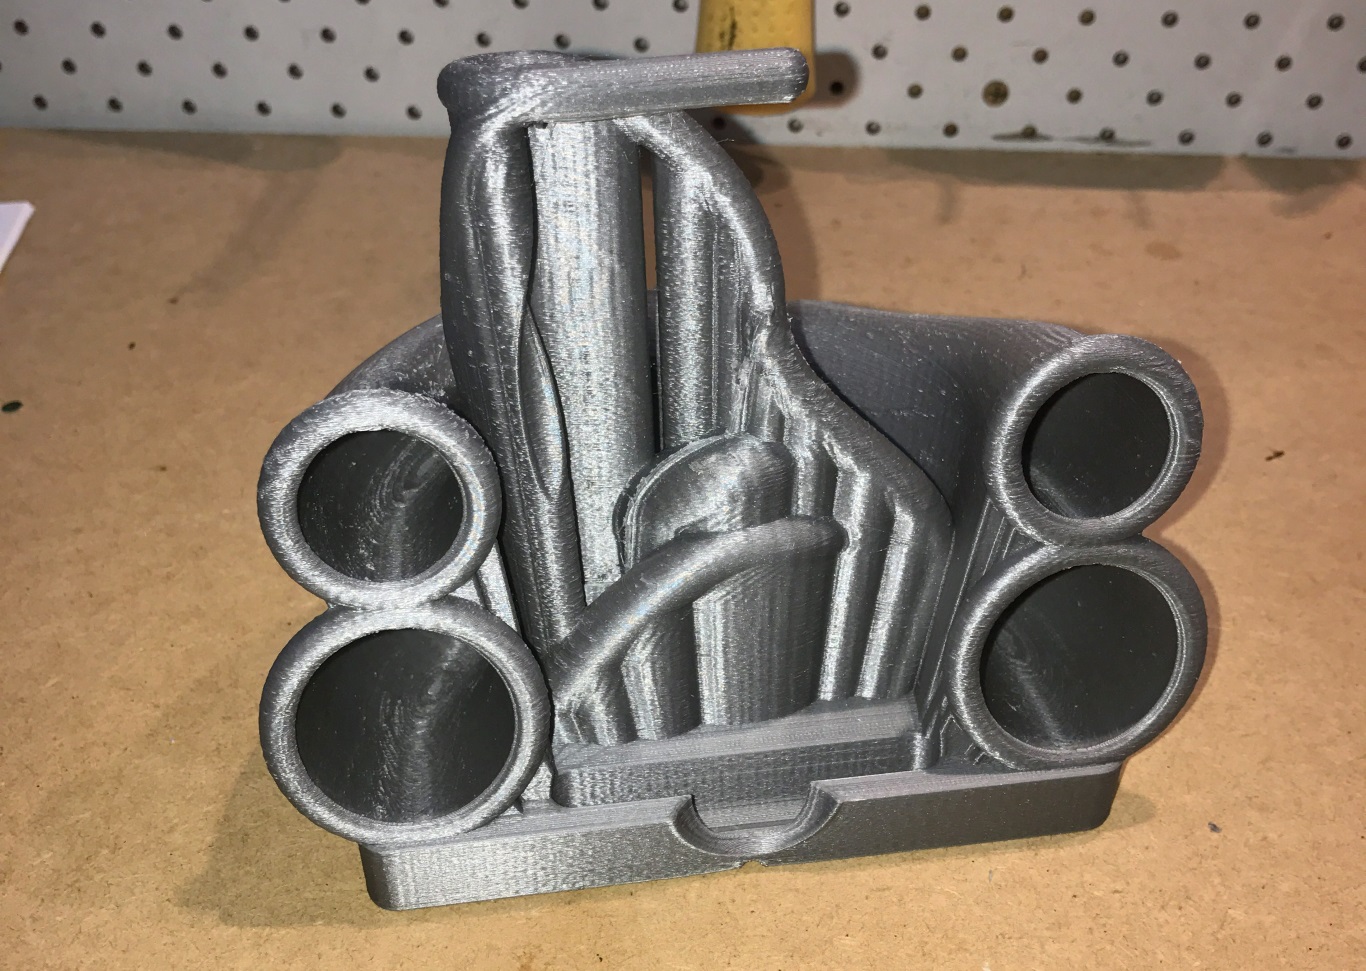
There are two small rectangles on either side of the model, these are there to make sure that the 6" print width of many printers will be able to print this model once the first layer is done and not wait until many hours into the print. Throw them away after build.
Files and details are available at https://www.thingiverse.com/thing:2481209